How to Configure Wishlist in Magento2
Greetings of the Day My Friends!!!
A wishlist is the list of selected products which our registered customers share with friends and even which they consider for their later purchases. New Customers get attracted to your Magento2 store and even the customer’s loyalty is enhanced. The Wish list is easily managed by Customer on his Customer’s Account dashboard where he/she can update, share or add the wish list items to the cart.
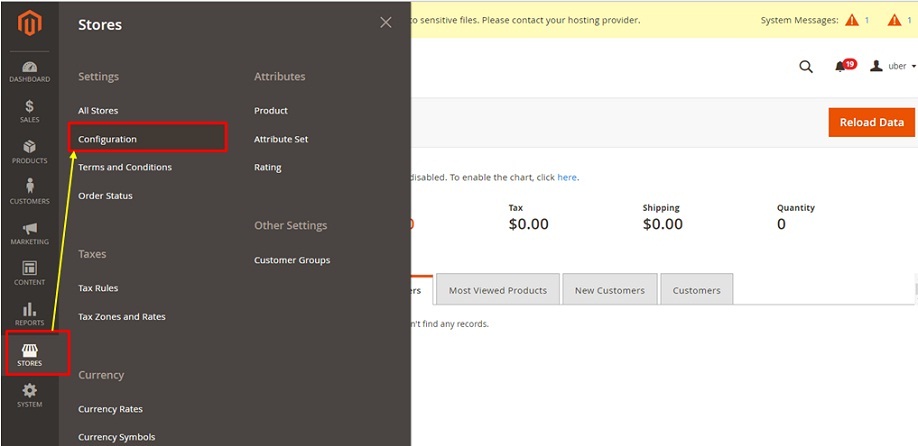
So, let’s start with the practical, Firstly we have the “Admin Panel Of Magento2” from where we select “Stores” and fetch the “Configuration” option under the title “Settings”.
Admin Panel → Stores → Settings → Configuration
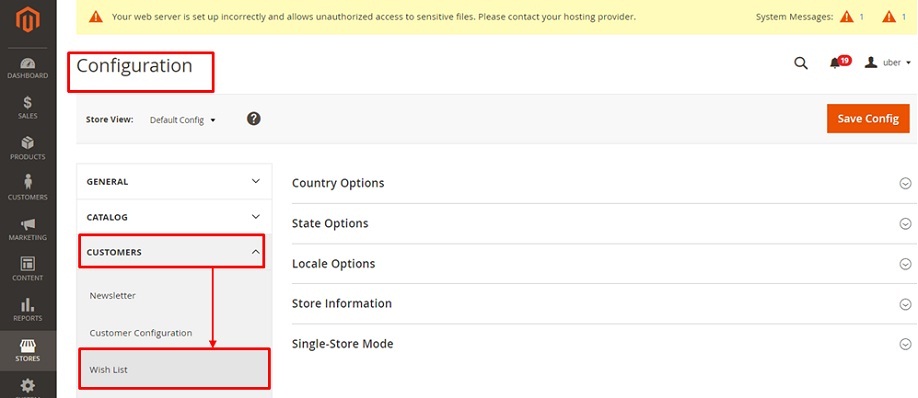
This will open the screen of “Configuration” from we need to scroll down and expand the option of “Customers” on the left corner and select the “Wish List” sub option given under it.
Configuration → Customers → Wish List
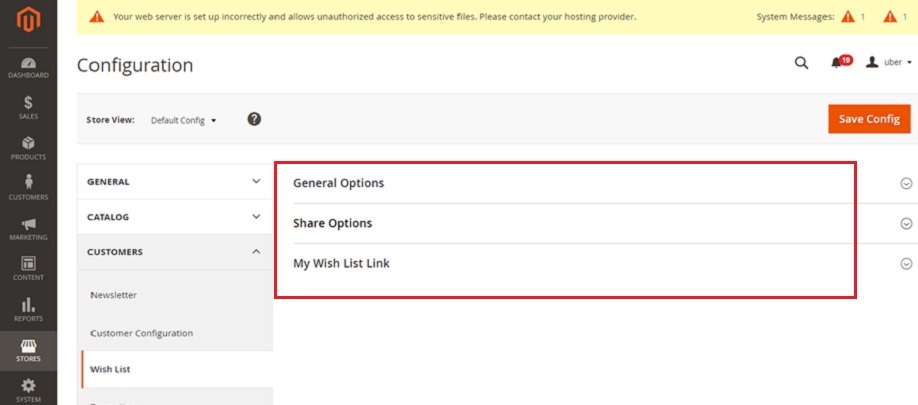
This will fetch this present screen of “Wish list” which has further three options for “General Options”, “Share Options”, & “My Wish list Link”.
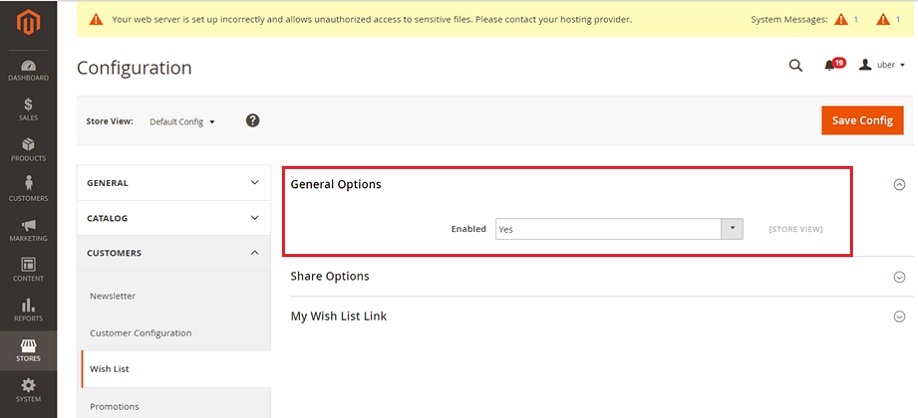
Starting from our first option “General Options”, we have only one sub-option of “Enabled” with “Yes” or “No” choices. Select “Yes” to show your wish list feature for the products. We selected “Yes” in our instance too.
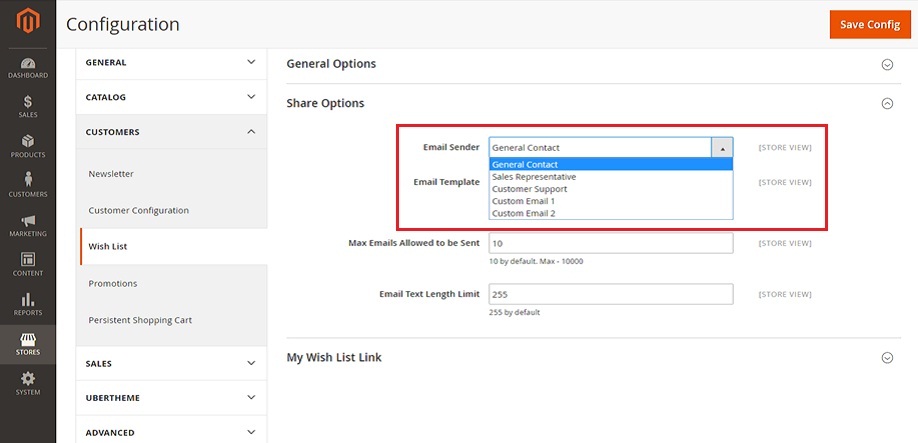
Next option is “Share Options” is now expanded and has four sub-options. Starting from first sub-option being “Email-sender” with choices of the sender of the notification like General Contact, Sales Representative etc of the E-mail along with wish list.
We selected “General Contact” in our instance.
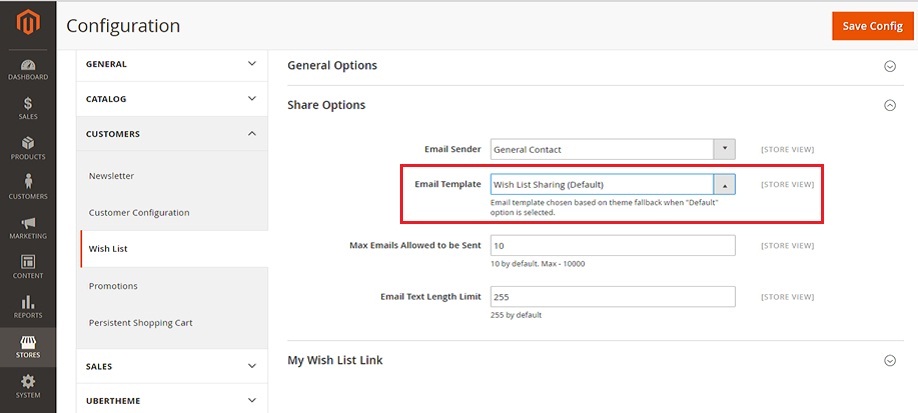
“Email Template” is the next option which depends on our theme fall back once default is chosen; here we select Wish List Sharing (Default).
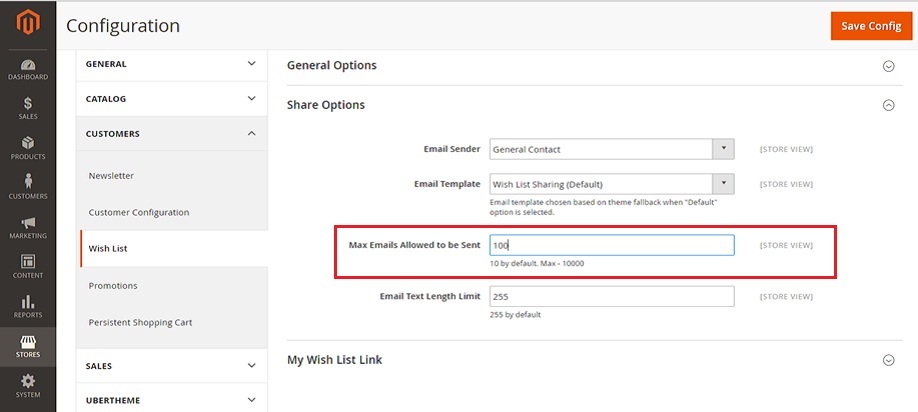
Next is the simple sub-option of “Max E-mails allowed to be sent” which decides the limit of Maximum E-mails we are required to send. We selected “100” in our case.
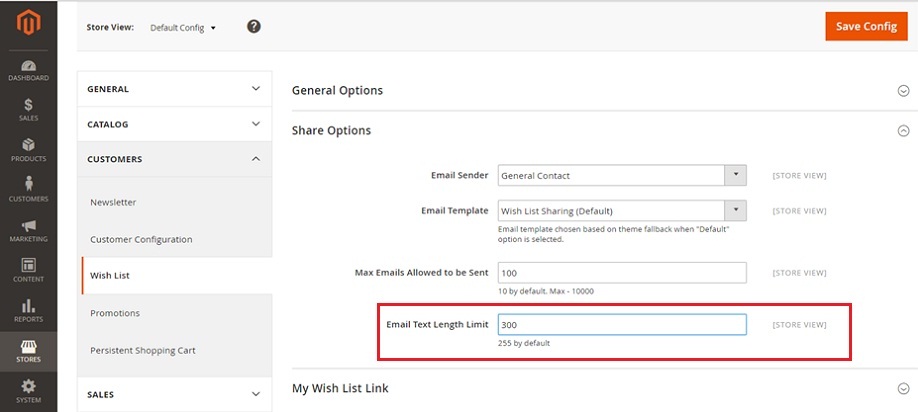
Last sub option under share options if for “Email text length” which is 255 words by default, and can be extended to required limit. We are keeping it “300” words for our instance.
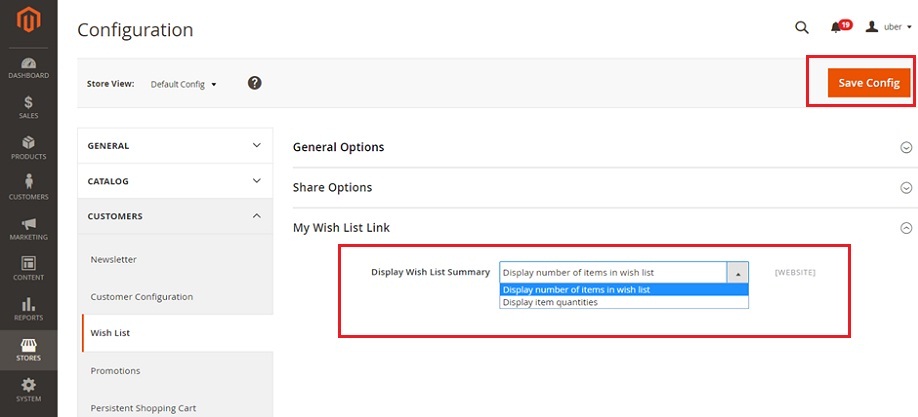
Last option is of “My Wish List Link”, with one sub option of “Display Wish List Summary” that decides the way we need to showcase our wish list items with two choices of “Display number of items in wish list” & “Display item quantities”.
We have selected “Display number of items in wish list” for our instance. And Save this all with “Save Config” button on right top corner.
So let’s see how it looks on Front-end for customers. But for that we need to log in for adding our products to wish list, as wish list works primarily for registered customers, and it does for Guest people if we have installed that Guest wish list extension or them.
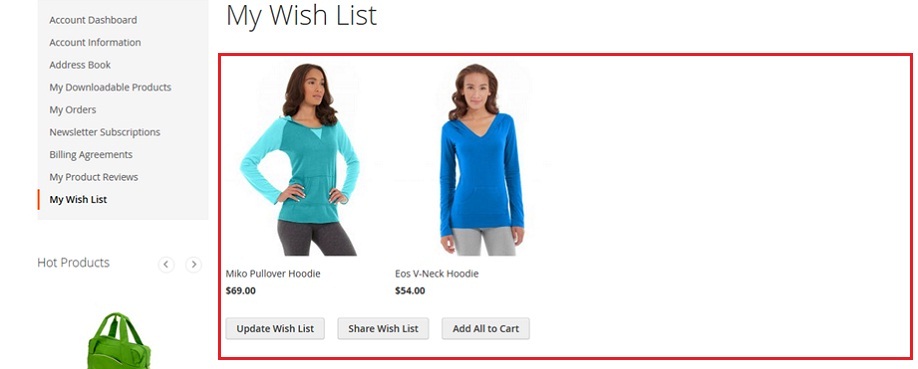
We see on the current screen the various hoodies, out of which we select two hoodies for our wish list.
So now we have our Wish list for a simple instance where we can easily see our selected items for wish list, which can be updated, shared or even, can be added to the cart.
Next is What??? Next is your turn to go and explore your Magento2 store with this exciting feature of Wish list & let your customers enjoy their shopping experience.
Avail our Custom Magento Development Services or do call us at: 855-370-5507 or e-mail us at magento@matridtech.net.
Leave your details and we will contact you back within next 12 hours.
Let your magento store add more to your magnetic power to allure customers with our easy magento store.

