How to Manage Customers and Customer Groups in Magento2
Rise & Shine My Lovely Audience.
The key steps which are involved for managing the customers will be discussed in the current session of Magento 2- How to Manage Customers and Customer Groups.
Customers are categorized into different customer groups, so that they can be easily managed & augment the over-all store performance along with unbeatable customer experience.
In Magento 2 it’s easy to manage customers; we need to know about two things. First being how to create a “New Customer” & secondly how to create “Customer Groups”.
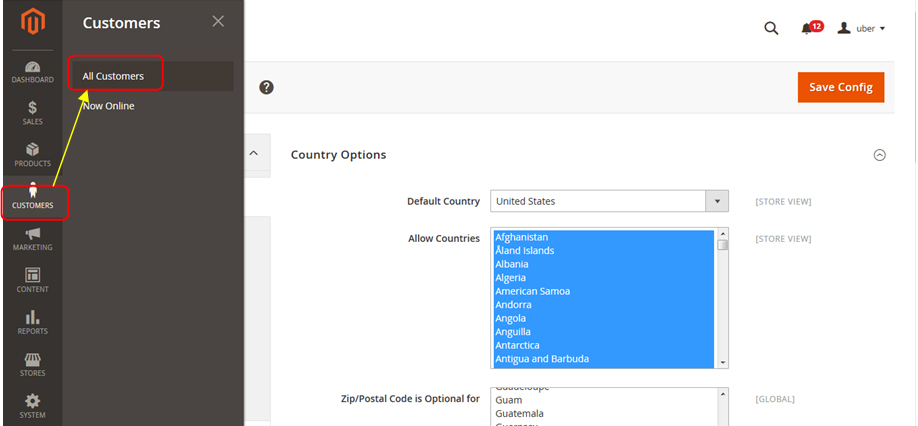
So let’s start our action now. For this we need our Magento 2 admin panel and then we have to select “Customers” section, then moving to “All Customers” option.
Admin Panel → Customers → All Customers
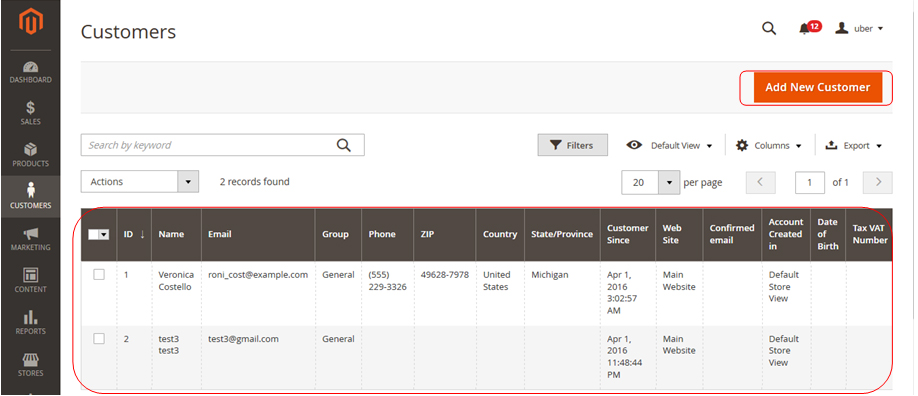
This will open the current screen for us which will show us all the customers on our website. To create a new customer, we need to click on the “Add New Customer” button on the top right corner of the page.
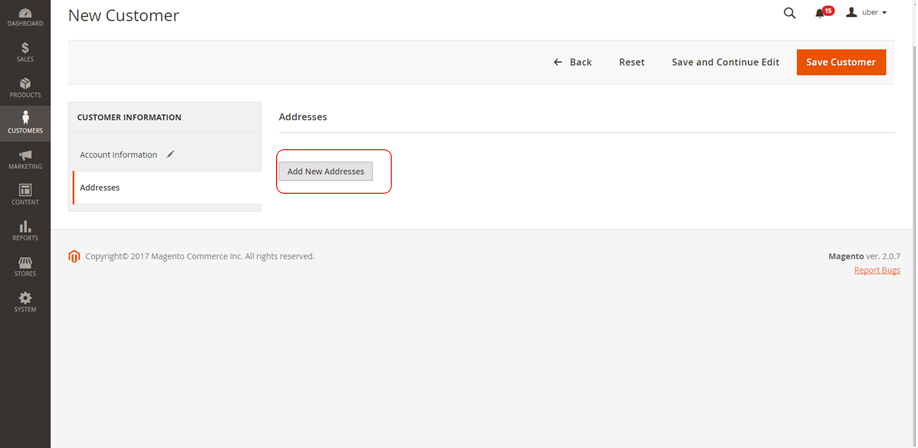
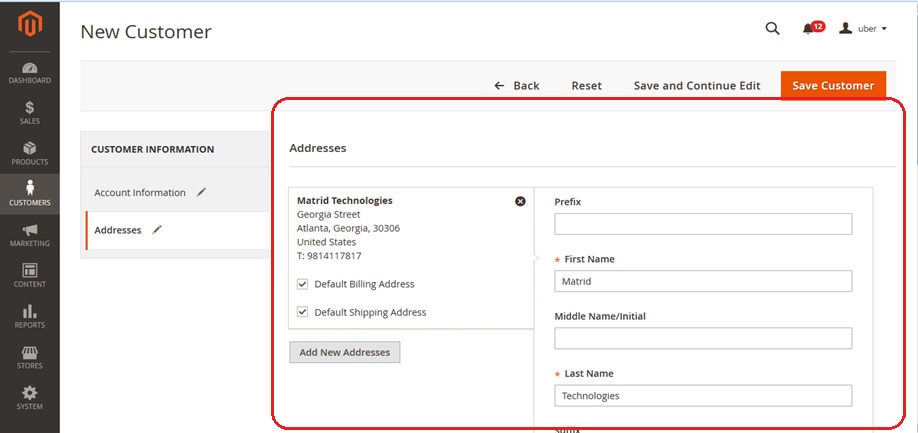
After clicking the button we get the screen for “New Customer“ having two main tabs on left corner for “Account Information” & “Addresses” under Customer Information.

Starting from “Account Information” we need to type in basic details of the customer, i.e. “Associate to website” with which we need to link, then the “Group“ which we need to assign. Moving ahead is “First & Last name” along with “E-mail id”, which our customers have. Rest of the options can be filled as per your requirement.
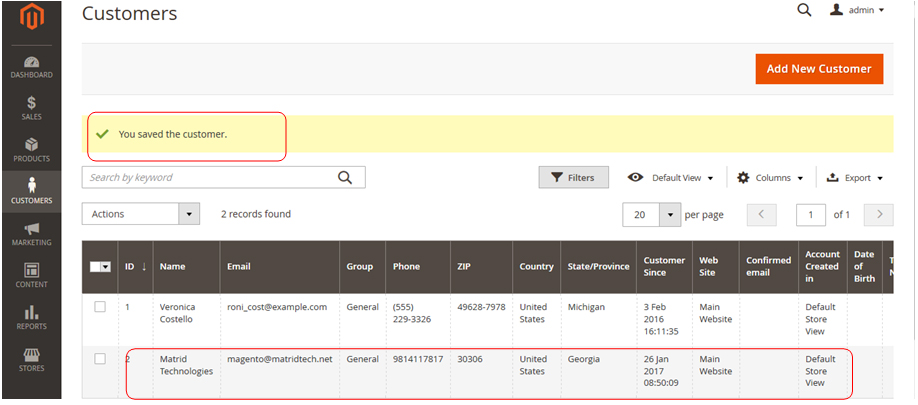
In our instance we took ‘Main website’ as option for “Associate to website”, and then customer group we selected is of ‘Wholesale’ as our “Group”. Further we entered the “Firstname” & “Lastname” as ‘Matrid’ ‘Technologies’ along with “E-mail” as ‘magento@matridtech.net’.

Next option is for “Addresses” where we can enter a new address by selecting the button of “Add New Addresses”.
After entering the address of the customer, we can select the entered address as the “Default Billing & Default Shipping” if it is required.
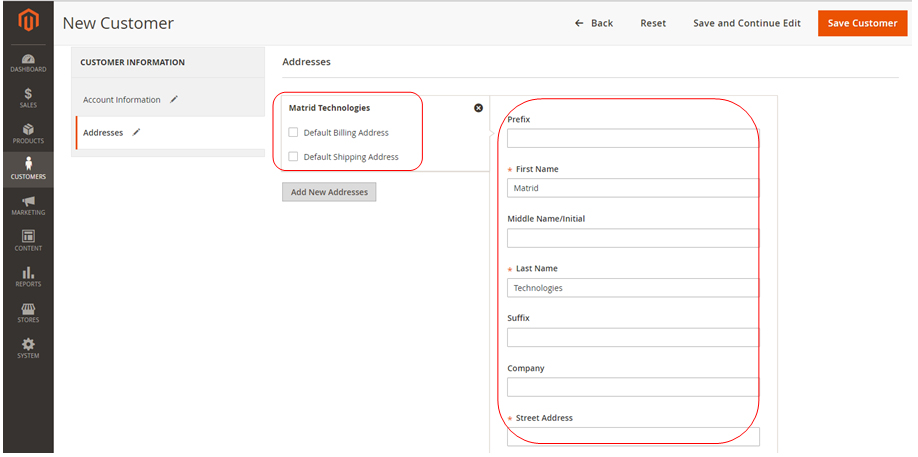
We quickly type in address details and mark it as both shipping and billing address.
Now, we have to save the work done so far with “Save Customer” button on right above. We can see our newly added customer on ”All Customers” screen.
Jumping ahead is our next section for creating a “New customer group” by selecting the “Stores” section and then clicking on “Customer Groups” falling under “Other Settings”.
Stores → Other Settings → Customer Groups

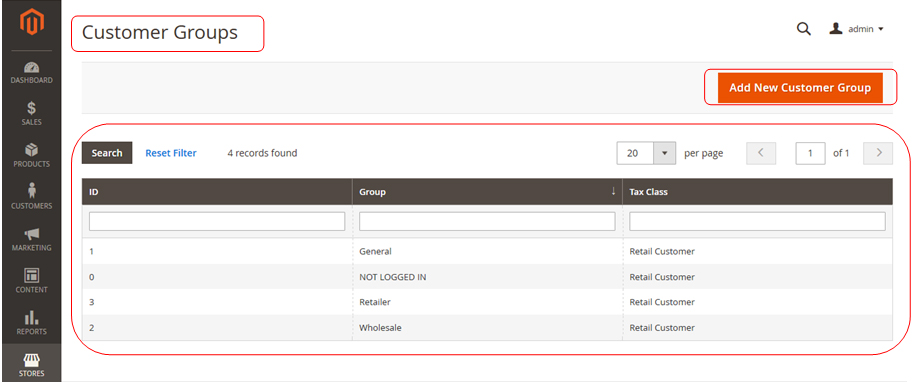
After selecting “Customer Groups”, we have the current screen showing us all the customer groups. We can add new customer group by clicking on the button “Add New Customer Group” on the top right corner of the screen.
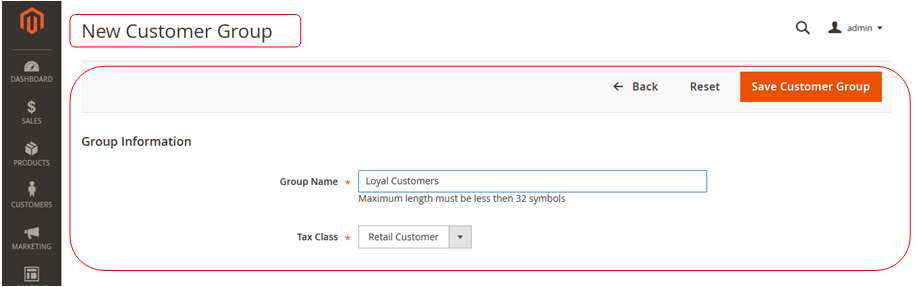
Clicking on the button will have the current screen for “New Customer Group” with two options. First being the “Group Name”, secondly being ”Tax Class”.
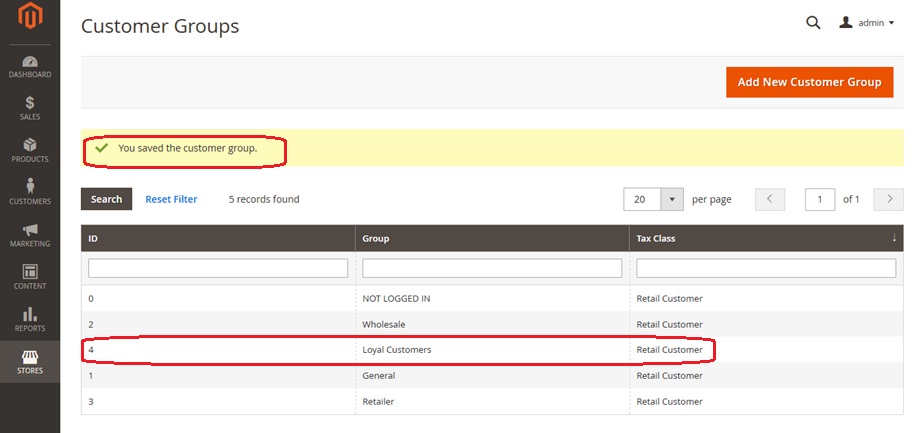
For an instance we made “Group name” as ‘Loyal Customers’ with “Tax Class” as ‘Retailer’ and saved it “Save Customer Group” button on right above corner.
We can see our newly added customer group of “Loyal Customers” on the screen of ”Customer Groups”.
Next is What??? Next is your turn to add new customers & customer groups to enhance the overall customer experience & satisfaction for your Magneto 2 store.
Avail our Custom Magento Development Services or do call us at: 855-370-5507 or Email at: magento@matridtech.net.
Leave your details and we will contact you back within next 12 hours.
Let your Magento store add more to your magnetic power to allure customers with our easy Magento support.