How to Add or Manage Categories in Magento2
Greetings of the Day My Friends!!!
You are wholeheartedly welcome to our learning session of “How to Add or Manage Categories in Magento2”
Categories play a pivotal role in sorting the store products in meaningful grouping. An eCommerce merchandiser needs to put it in logical flow to enhance the user experience for easier site navigation. It is very important for visitor retention on the website.
Magento2 comes with the Default Root Category. You as store owner or developer are free to add categories under the default root category. You need to assign each category under the parent category. Any unassigned category is hidden with gray.
Magento2 has a very easy category management by simply dragging, dropping & holding them to your preferred new parent. A Category Id is assigned to each & every category, which can be seen next to category name.
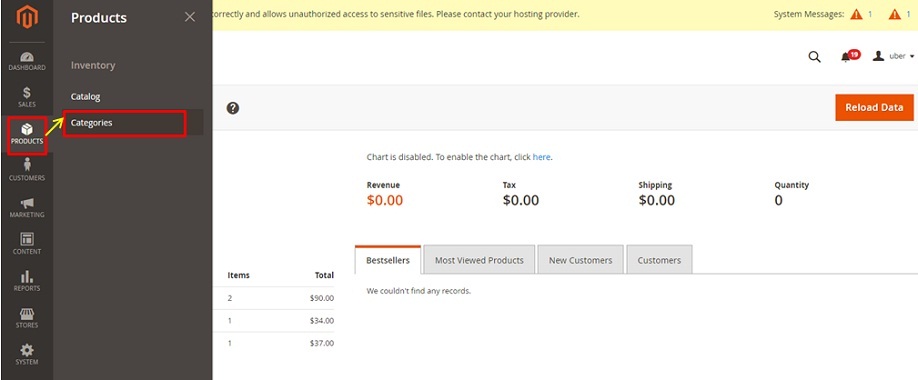
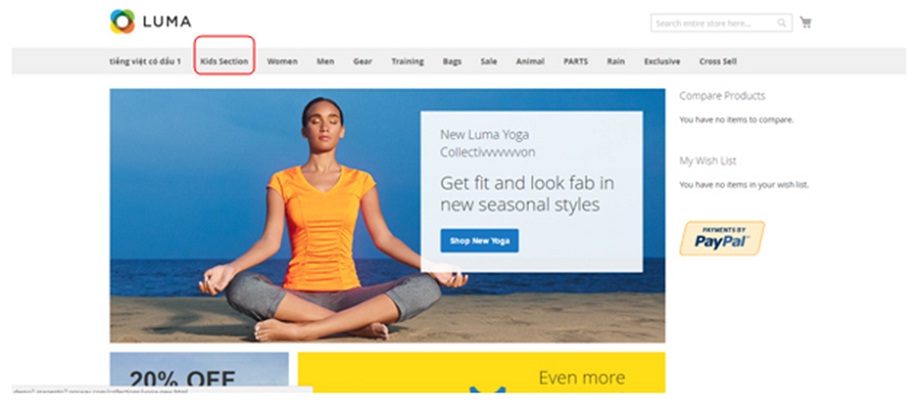
So let’s get practical with our said words. We need to dive into the “Admin Panel of Magento2” to swim towards “Categories tab” falling under “Products section”.
Admin Panel → Product → Categories
Now, on the present screen we have three things on the left corner. First button is of “Add Root Category”. Root Category is the prominent part or we can say luminary of the family who will be having it’s off springs i.e. Subcategories in our Magento term & will be created with “Add Subcategory” button as our second button, given next to first one.
Third thing is the Hierarchy Tree or should we say “Category Tree” being a Magento user. We can also see the unassigned categories hidden as grey under the Category Tree.
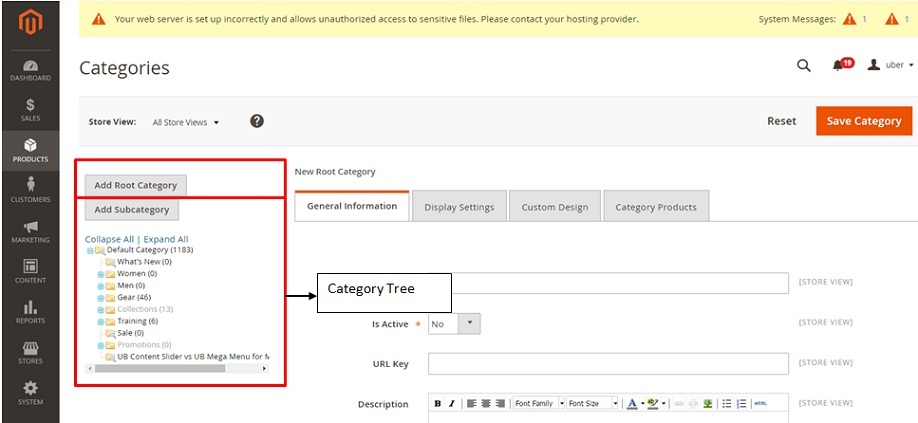
Magento2 installation comes with a Default Category as root and to keep it simple let us make all the sub-categories i.e. category tree under the Default Category. You can of course create siblings of Default Category as other root categories. In the default installation, root categories are not displayed on front end, it is only the sub-categories which we see on the front-end.
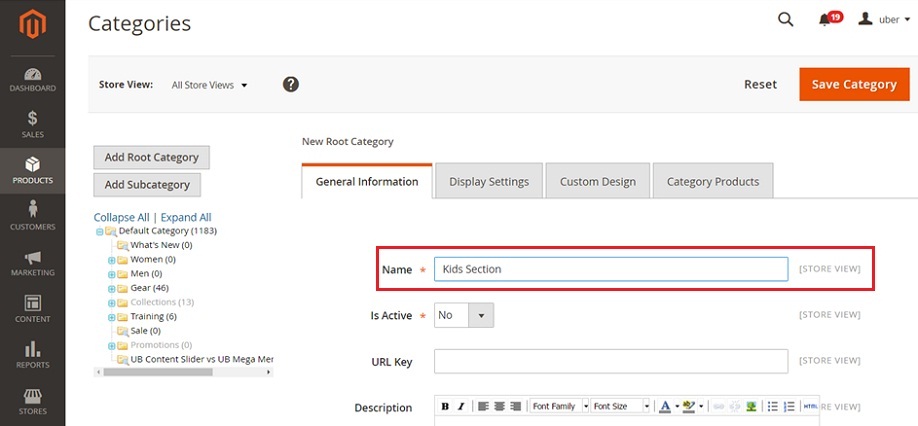
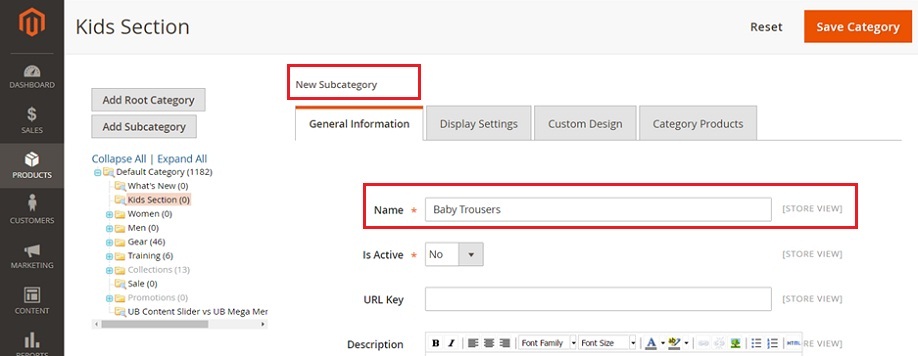
So, we will start from adding our Category by clicking firstly on default category and then clicking on “Add Sub Category”. This will open the screen of “New Subcategory” as we can we see now, having four tabs first of “General Information”, secondly of “Display Settings”, thirdly of “Custom Design”, fourthly of “Category Products”.
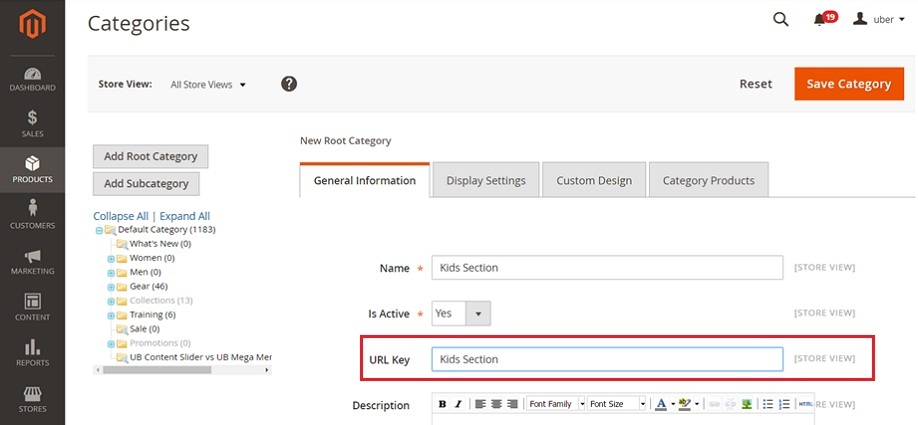
Starting off from “General Information”, we have “Name of New Category”, for which we will be writing as “Kids Section”.
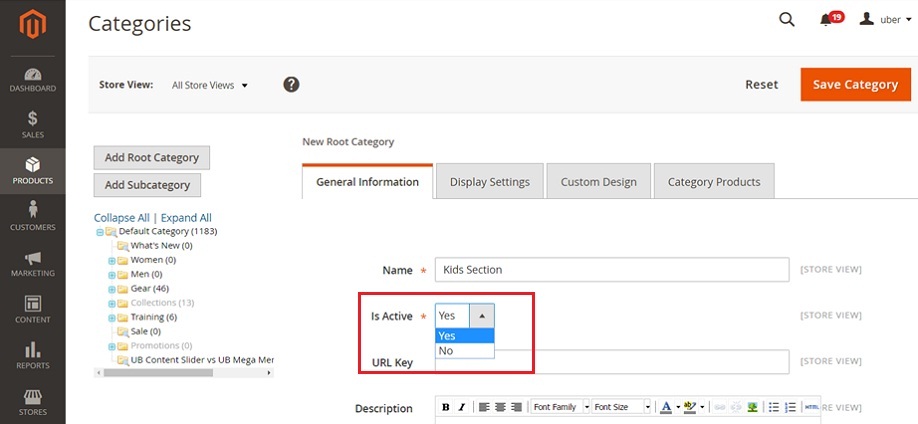
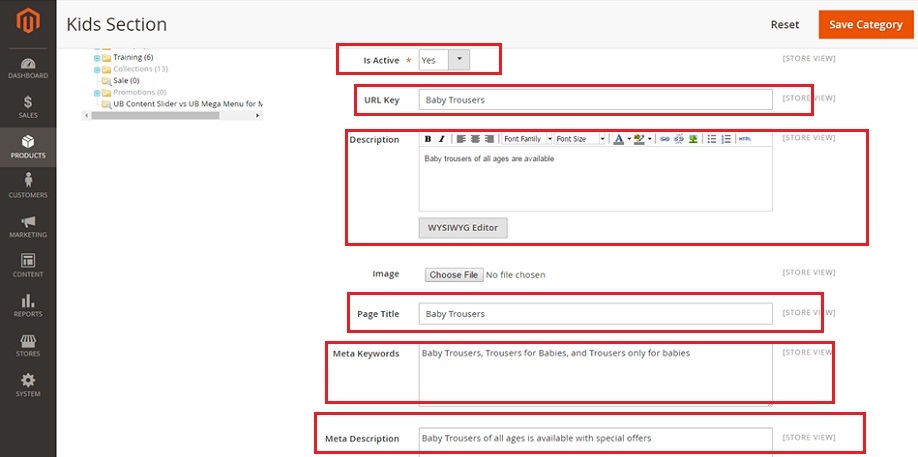
Enable the active or deactivate state of category with the next option of “IS Active” with options of “Yes” or “NO” respectively. We selected “Yes” in our instance to make it active on front-end.
Next option is the “URL Key” which can be created manually or of its own. You can keep it automated unless you need a unique URL for your SEO purposes.
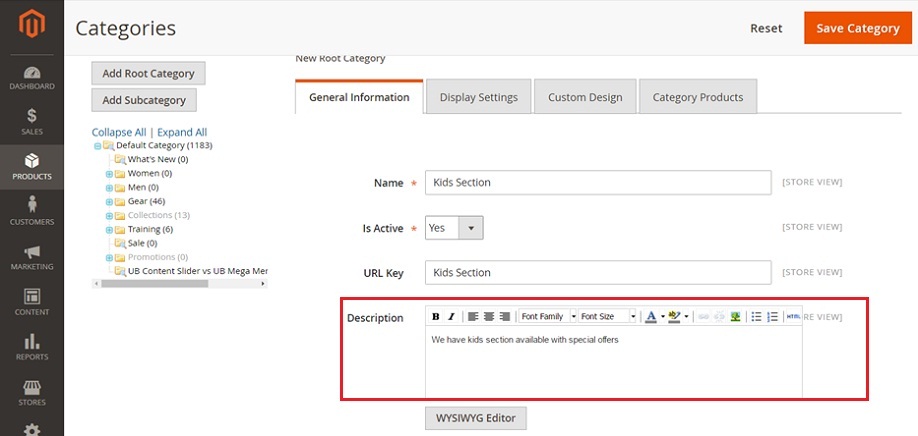
Talking of next option is the “Description” with box to add some description about category. We have typed basic thing “We have kids section available with special offers”.
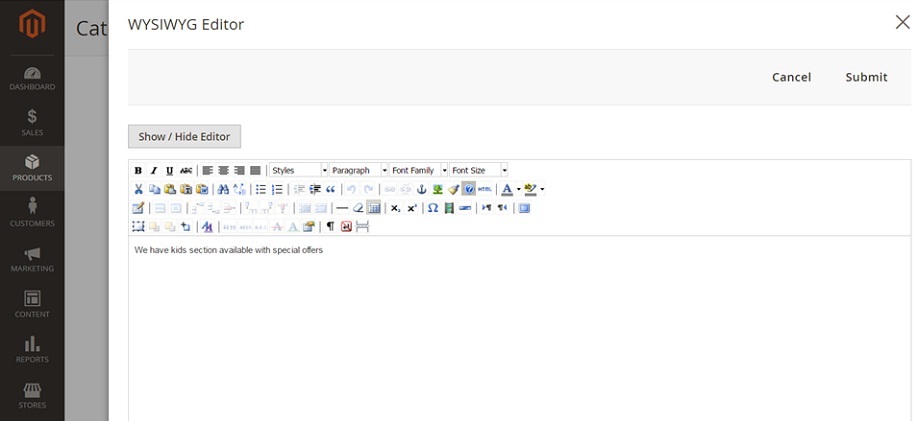
This can be further being edited with “WYSIWYG Editor” as per the requirement and there you can add images, make text bold, colorful, add links etc. It is only recommended for a beginner level website. If you have an eCommerce Developer or Company by your side better manage all these advanced things through CSS.
Jumping ahead is the option for “Image”, which can be uploaded if required. In our instance it is not required at the moment, so we step ahead to next selections.
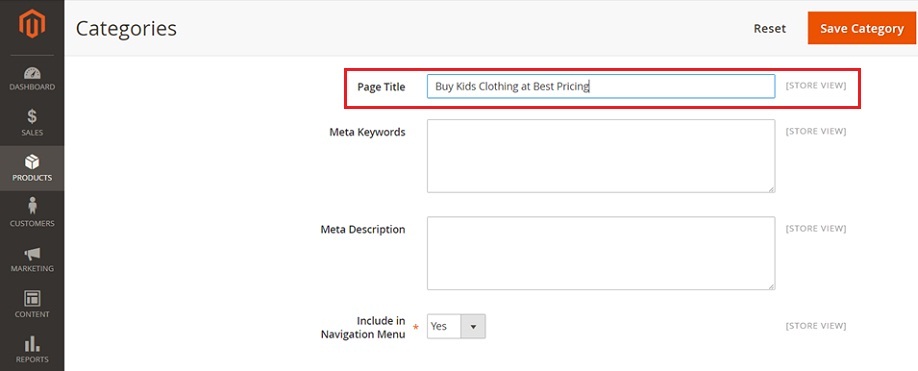
“Page Title” being the next option is title of the page that will be shown on top of browser and is a most important for the SEO. Again, if you have a Magento Developer or Magento Development Company with you, then, get it managed with a coding script. In our case, we are going to write it as: “Buy Kids Clothing at Best Pricing” to keep us high in search results for the same.
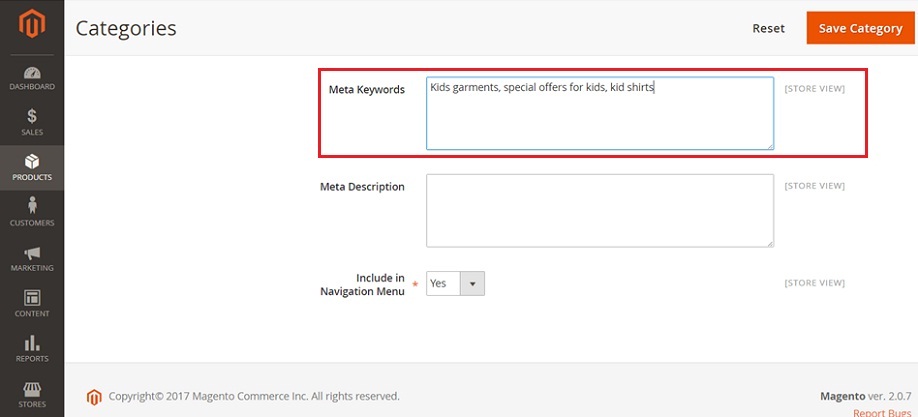
Next option is “Meta Keywords”, which in fact is said to be a redundant field and no more much regarded by major search engines like Google, Yahoo and Bing etc. It is really an interesting fact and this debate was started by none other than Matt Cutts as back as in the year 2009. To be precise, now, we need to use it very carefully and in any case should not make it excessive or use irrelevant keywords which do not belong to our web page. We have used “Meta keywords here as kids clothing, Kids garments, special offers for kids, kid shirts”.
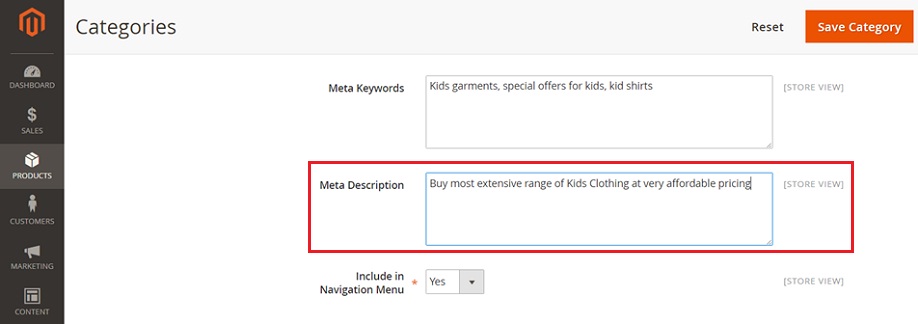
Crawling to next option of “Meta Description”, which is a brief description of the category that will help search engines in better understanding of category. It is very relevant field and most of the times shown by Google Search Results as description on the face of search results. If you have resources, you should do it very innovatively like it can be: “Buy most extensive range of Kids Clothing at very affordable pricing at www.matridtech.net”.
As this is going to be shown in search results, so going to really matter in getting a click among other competitors results on the page.
Next option is of “Include in Navigation Menu”, this need to be selected as “Yes”, if you wish to show that in navigation bar. We have selected “Yes” in our instance.

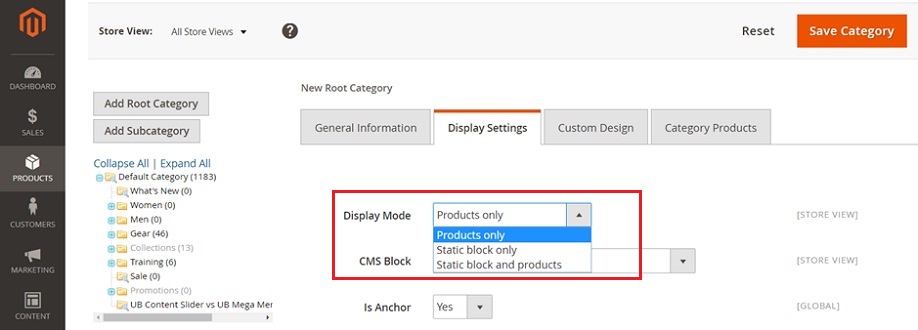
Hopping to our next tab of configuring the “Display Settings”, we see the first option of “Display Mode”, the way we need to showcase our category with 3 choices, firstly as “Static Block only”, “Products only” or “Static Block & Products”.
We have selected “Products only” in our instance. With Static Blocks you can add anything custom on the page, by creating blocks of content which can be displayed throughout your store.
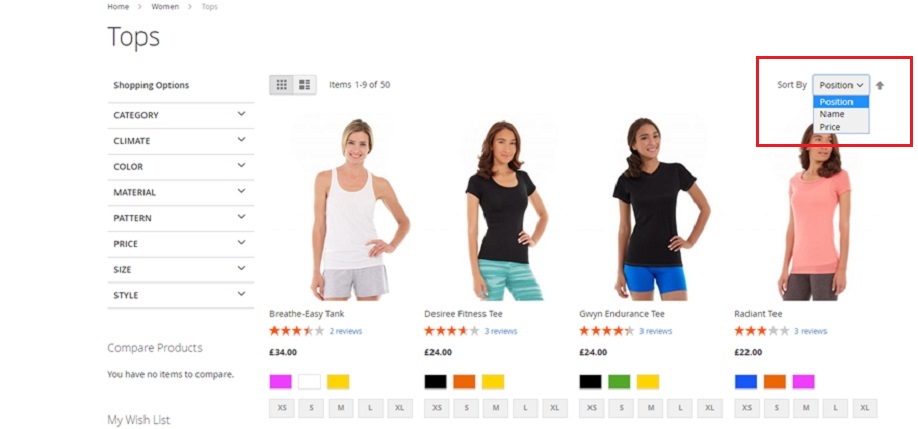
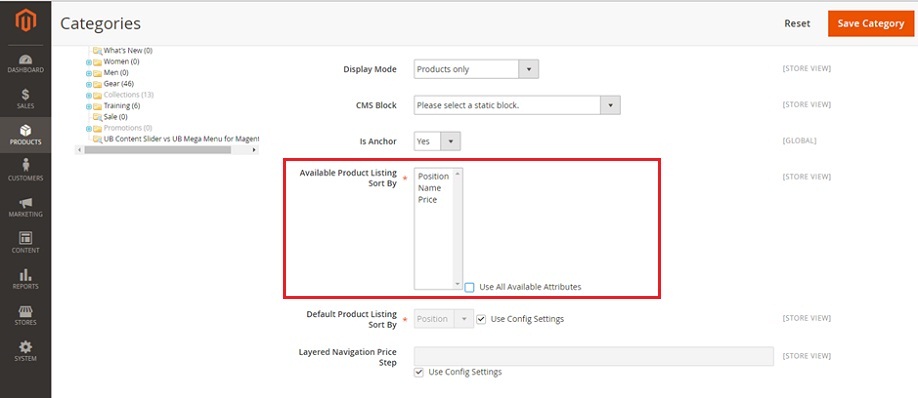
Leaping to next is option of “Available Product Listing Sort by: Position, Name or Price” on front end by customers, like here we see on front end for Women → Tops.
Here we can see all the available attributes.
So, for our instance we have selected “Use all Attributes”
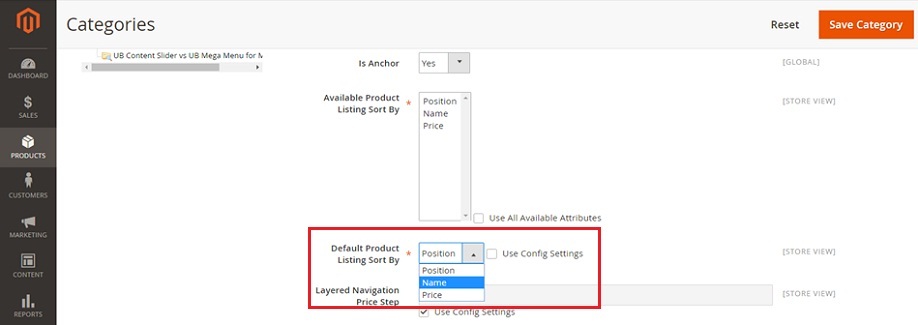
Shifting ahead is “Default Product Listing Sort By” one particular attribute, like position, name or price or using the advanced configured settings.
We have selected ‘Name’ which will display products by Name when the page first loads.
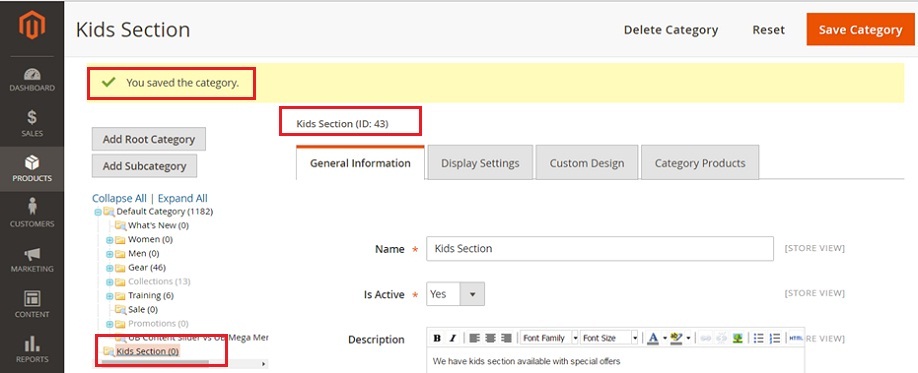
Now save the Category with all the work done so far. Saving this we can see the “Kids section” getting displayed under Category Tree on the left corner. Kids section has the “Category Id” also now which can be displayed as “Kids Id-43”.
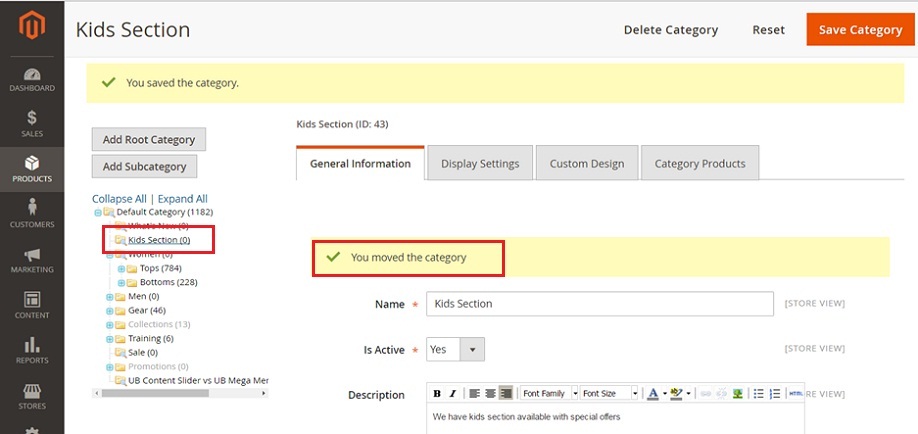
As we said before, you can customize your categories by easily dragging, holding & dropping your new category to your preferred position; likewise we are doing by putting kids section before women category. Here you see, that’s simple & do refresh your front end page for this.
We are going to skip the ‘Custom Design’ for now and let’s hop directly to the last tab of ‘Category Products’.
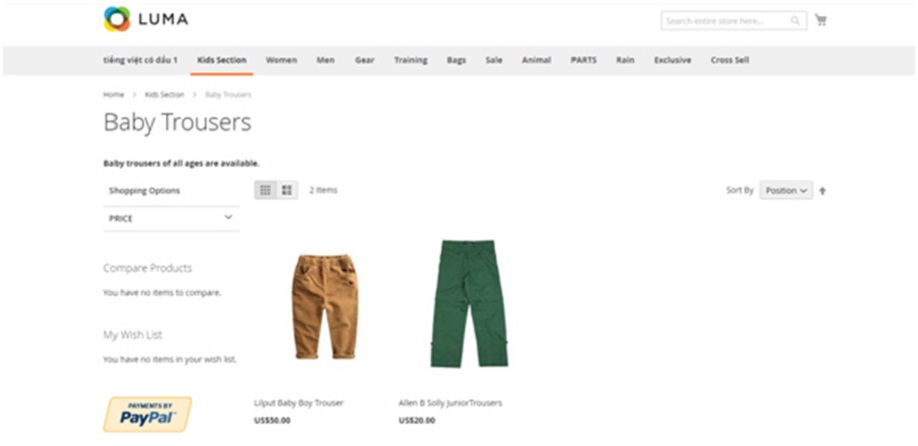
Here we will map the products which are to be shown under this sub category i.e. Kids Section in our case. We can directly show in this category or can further drill down and make logical child categories of ‘Kids Section’ which can be e.g. ‘Kids Shirts’, ‘Baby Trousers’ etc.
Here, we have created one more sub category as “Baby Trousers under kids section”, with the same procedure done so far.
So let’s select our “Kids section category”, then “Add Sub Category”.
“Sub Category Name” we are selecting is “Baby Trousers”.
We are making the state for category active with option “Is Active” with selection of “Yes” and quickly moving to further options of “URL key” as “baby trousers”.
“Description” we are giving is “Baby trousers of all ages are available”. “Page Title” is “Baby Trousers- Let’s buy it”. “Meta Keywords” selected for the category are “Baby Trousers, Trousers for Babies, and Trousers only for babies”. “Meta Description” given for the category is “Baby Trousers of all ages is available with special offers”.
Now we are again shifting to “Category Products” and selecting the products from the list given and adding to the category.
Quickly save the category & let’s see our work on front end.

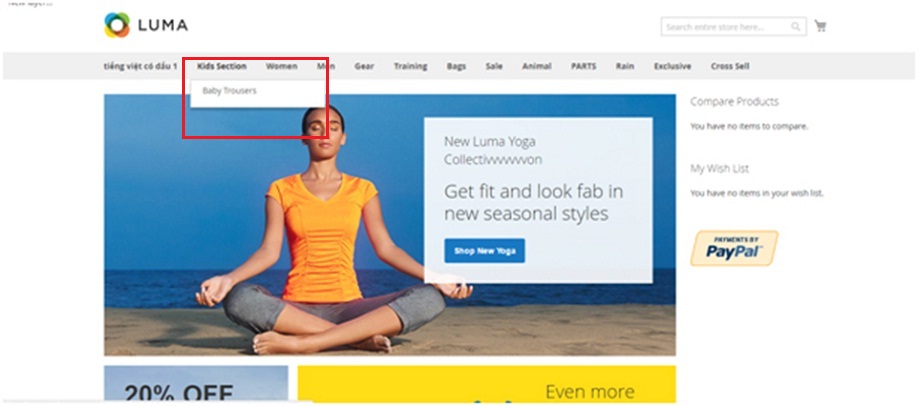
We have the category of kids section having sub category of baby trousers on the front end.
Then clicking on baby trousers, we can easily see our products on the screen.
Now what’s next? Next is your turn to go & explore Magento2 Store and add categories for your store products. Add Magnetic power to your Magento store with our easy magento help.
Avail our Custom Magento Development Services or do call us at: 855-370-5507 or e-mail us at magento@matridtech.net.
Leave your details and we will contact you back within next 12 hours.
Let your magento store add more to your magnetic power to allure customers with our easy magento store.